 Drying between coats.
Saturday, August 14, 2010
Just a teaser.
Yeah, I haven't been doing much in the way of artings. I've been too busy riding my bikes. But for the one or two people who may still look here, Here's a teaser:
 Drying between coats.
Drying between coats.

Friday, March 19, 2010
Holy wooden projects, Batman!
Yeah, I've been lazy. I've got bowls done that just need to be photographed, and then posted about. All except for this one, which I hurried up and took pictures of before I gave it away to my roomie's parents... which was before Christmas... yeah, I've been lazy.
This is a bowl turned from a clear pine board, cut into squares and laminated before turning. It was an experiment, as I've been wanting to do some taller turnings, and this is the first one I've done. I don't remember the actual size, but it was between 4 and 5 inches tall, and roughly 7 inches in diameter. Finished with my usual combination of natural Danish Oil and polyurethane. If I had known it would turn out so light in color, I would have tried staining it, but as it is, it looks nice:

Next up is a project I became involved in at work. My boss brought in a chess table with a big nasty ugly crack right down the middle of the tabletop. My task was to fix it. I don't have any before pictures of it, but imagine a crack nearly 1/4 inch wide running with the grain along the entire width of the table, with evidence of glue having been poured into it in an effort to keep it from worsening, which failed.
I ultimately ended up disassembling the table completely, and finished the job that the table was trying to accomplish in the first place, splitting the table completely in half along the crack. I had to carve out all the old glue, sand down the joining areas, and save as many of the small chips of wood along the upper finished edge of the crack as I could. After all this, I put it on the press and joined the two halves together with generous amounts of Gorilla Glue.
Due to the different expansion rates of the wood in the center of the table versus the wood used for the border, the crack in the border did not close completely, though it was less than half the width it was. The crack across the chessboard portion closed up nicely, in comparison. I ended up puttying the cracks in the border, and staining the putty with a custom mixed stain to match the wood. After all this, I sanded the entire table top with 600 grit paper, and lacquered it.
 Drying in the spray booth at work between coats.
Now, because the table was now over 1/8 of an inch smaller in one direction, none of the screw holes on one side were going to line up. And with age, all the holes had opened up to the point that if I had put the screws back in, the holes would strip as I tightened them down. So, I used a hardwood dowel to fill the holes, basically giving me a brand new spot for each screw.
In the end, I think my efforts paid off:

 I'm happy with it, as it turned out better than I had hoped it would. It was also a learning experience for me, as well as a refresher for some techniques I haven't used since high school. Hopefully my repair will last another 50 years.
This is a bowl turned from a clear pine board, cut into squares and laminated before turning. It was an experiment, as I've been wanting to do some taller turnings, and this is the first one I've done. I don't remember the actual size, but it was between 4 and 5 inches tall, and roughly 7 inches in diameter. Finished with my usual combination of natural Danish Oil and polyurethane. If I had known it would turn out so light in color, I would have tried staining it, but as it is, it looks nice:


Next up is a project I became involved in at work. My boss brought in a chess table with a big nasty ugly crack right down the middle of the tabletop. My task was to fix it. I don't have any before pictures of it, but imagine a crack nearly 1/4 inch wide running with the grain along the entire width of the table, with evidence of glue having been poured into it in an effort to keep it from worsening, which failed.
I ultimately ended up disassembling the table completely, and finished the job that the table was trying to accomplish in the first place, splitting the table completely in half along the crack. I had to carve out all the old glue, sand down the joining areas, and save as many of the small chips of wood along the upper finished edge of the crack as I could. After all this, I put it on the press and joined the two halves together with generous amounts of Gorilla Glue.
Due to the different expansion rates of the wood in the center of the table versus the wood used for the border, the crack in the border did not close completely, though it was less than half the width it was. The crack across the chessboard portion closed up nicely, in comparison. I ended up puttying the cracks in the border, and staining the putty with a custom mixed stain to match the wood. After all this, I sanded the entire table top with 600 grit paper, and lacquered it.
 Drying in the spray booth at work between coats.
In the end, I think my efforts paid off:

 I'm happy with it, as it turned out better than I had hoped it would. It was also a learning experience for me, as well as a refresher for some techniques I haven't used since high school. Hopefully my repair will last another 50 years.
Friday, February 12, 2010
Random cool pictures
So, I was getting things ready to build a wheel truing stand, when I discovered a cool kaleidoscope effect with one of the parts. So out of curiosity I grabbed my camera to see if it would pick it up.
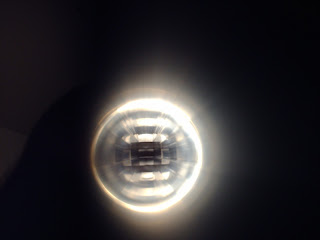
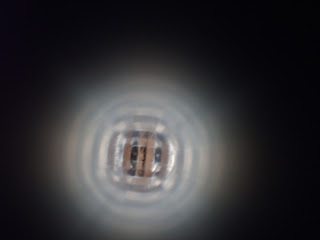
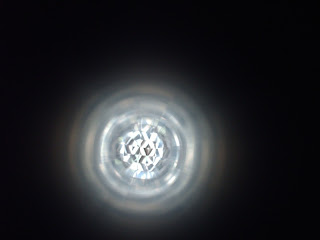
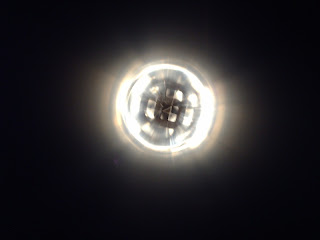


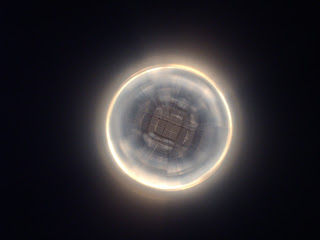

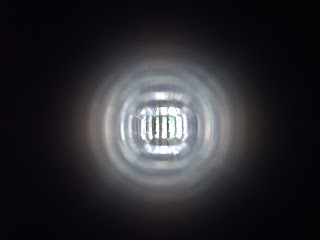
 No photoshop effects, no processing other than to resize them. I was aiming the camera and the tube at random light sources. (a lamp, a window, another window, a wall...)
I thought it was a neat effect, and since it's been a while since I put anything here... here we go. I may have to build on this eventually.


 No photoshop effects, no processing other than to resize them. I was aiming the camera and the tube at random light sources. (a lamp, a window, another window, a wall...)
I thought it was a neat effect, and since it's been a while since I put anything here... here we go. I may have to build on this eventually.
Sunday, November 15, 2009
Walnut
Further digging into my pile of scraps that my friends have given to me... I present this walnut bowl. It's rather hard to tell in the pictures, as the camera did a good job of washing out the color, but it's actually a cut spanning both the dark heartwood (black walnut) and the sapwood. It made for a very nice blending effect on the inside of the bowl.

 I forgot to measure this one before I gave it away, but my guesstimates put it at about 7 3/4 inches across, and 1 3/4 inches tall. It is finished with natural flavors of danish oil and polyurethane. One of the things I like most of this bowl, besides the grain, is the fact that there are next to no turning marks in it.
Walnut is one of my favorite woods to turn, and this is the first piece I've done in quite a while, as well as the first time I've turned walnut across the grain. The last time I did a bigger walnut piece, I didn't have as much experience or patience with woodturning as I do now, and while what I made is pretty, there is a huge difference in quality between then and now. But then I go and look up what professional turners are doing, and realize I have a long way to go.

 I forgot to measure this one before I gave it away, but my guesstimates put it at about 7 3/4 inches across, and 1 3/4 inches tall. It is finished with natural flavors of danish oil and polyurethane. One of the things I like most of this bowl, besides the grain, is the fact that there are next to no turning marks in it.
Walnut is one of my favorite woods to turn, and this is the first piece I've done in quite a while, as well as the first time I've turned walnut across the grain. The last time I did a bigger walnut piece, I didn't have as much experience or patience with woodturning as I do now, and while what I made is pretty, there is a huge difference in quality between then and now. But then I go and look up what professional turners are doing, and realize I have a long way to go.
Friday, October 23, 2009
Step by step
Yesterday as I was sorting boards out in preparation to glue them together into blanks, the idea came to me to show a little bit of a step-by-step of how I prepare and turn the majority of my bowls.
First, we need a board:
 That should work. I got some more cedar from one of my friends at work, and we planed it down smooth and cut it into 8 inch squares. When I laminate boards together for cross-grain bowls, I start by lining all the pieces up the same way they were cut out of the board. This helps the grain to line up and flow with an uninterrupted look around the outside of the bowl. The straighter the grain is, the better the effect, but the more figured the grain, the more interesting the look.
I figure out which end I want to be the top of the bowl, and which one the bottom. Most of the time, I try to have the more solid and straight pieces at the top to add strength to the rim of the bowl, with figured and cracked pieces at the bottom, so the larger mass of wood there will help keep it together. It doesn't always work out that way. But, once I've decided, I start at the end that I want to be the top, and pick that piece up, and set it down on the next one. Then pick those two up, and set them on the next one, and work down accordingly, until it looks like this:
 Looking at the end grain of the boards, it looks like it'll be a nice flowy piece. Once I'm happy with it, I mark the boards in a way that will help me remember how to orient them with the rest, and start gluing. I try to do one glue joint at a time, which helps keep the glue lines narrow. For this block as well, I'm also using a jig to line the two boards being joined with each other as well. It cuts down on the frustration of having the two boards slide around as you're trying to clamp them together.
 Once the glue is set enough, (the glue I use has a clamp time of 30 minutes, though I wait an hour or more) I laminate the next board on, until I have the entire stack glued together. Then, I find the center, and glue on my faceplate block. That's so that when I mount the faceplate on the bowl blank, the screws are going into the cheap scrap wood, letting me use more of the project wood for the finished bowl.
 In the picture, the big stack is Spanish Cedar, and the small single board is cherry. Once the glue dries fully, about 24 hours, I take the blanks out to the lathe, cut the corners off to make them octagons, (much faster and less scary than roughing out the squares) and start turning! Hopefully these will get turned on Sunday.
First, we need a board:
 That should work. I got some more cedar from one of my friends at work, and we planed it down smooth and cut it into 8 inch squares. When I laminate boards together for cross-grain bowls, I start by lining all the pieces up the same way they were cut out of the board. This helps the grain to line up and flow with an uninterrupted look around the outside of the bowl. The straighter the grain is, the better the effect, but the more figured the grain, the more interesting the look.
I figure out which end I want to be the top of the bowl, and which one the bottom. Most of the time, I try to have the more solid and straight pieces at the top to add strength to the rim of the bowl, with figured and cracked pieces at the bottom, so the larger mass of wood there will help keep it together. It doesn't always work out that way. But, once I've decided, I start at the end that I want to be the top, and pick that piece up, and set it down on the next one. Then pick those two up, and set them on the next one, and work down accordingly, until it looks like this:
 Looking at the end grain of the boards, it looks like it'll be a nice flowy piece. Once I'm happy with it, I mark the boards in a way that will help me remember how to orient them with the rest, and start gluing. I try to do one glue joint at a time, which helps keep the glue lines narrow. For this block as well, I'm also using a jig to line the two boards being joined with each other as well. It cuts down on the frustration of having the two boards slide around as you're trying to clamp them together.
 Once the glue is set enough, (the glue I use has a clamp time of 30 minutes, though I wait an hour or more) I laminate the next board on, until I have the entire stack glued together. Then, I find the center, and glue on my faceplate block. That's so that when I mount the faceplate on the bowl blank, the screws are going into the cheap scrap wood, letting me use more of the project wood for the finished bowl.
 In the picture, the big stack is Spanish Cedar, and the small single board is cherry. Once the glue dries fully, about 24 hours, I take the blanks out to the lathe, cut the corners off to make them octagons, (much faster and less scary than roughing out the squares) and start turning! Hopefully these will get turned on Sunday.
Sunday, October 18, 2009
In progress
Today was lathe day. I got to try my hand at turning something a bit taller than I usually do, as well as turning one of a few pieces of walnut I've acquired.
Before:


And middle:

Just need to sand them and finish them.
Before:


And middle:

Just need to sand them and finish them.
Monday, October 12, 2009
A surprise for family
This weekend I went to Meadview for a fun filled weekend of motorcycle riding and sightseeing, and overall general vacationing. I tagged along with TC and Alex, and his sister, and we all stayed at their grandparents place. They've kind of adopted me, which is cool, and makes me feel all warm and fuzzy inside.
Anyways, I decided it would be cool to make a bowl for them, as sort of a thank you. Rather than giving it to them in person, though, I devised a scheme, which everyone helped out on. I decided to plant the bowl somewhere while we were getting ready to leave, in hopes they wouldn't find it until we were all gone, so it would be a surprise.
Fun, yeah?
It was incredibly hard to keep it hidden until the last moment when I put it onto their coffee table, at which point, it was incredibly hard to hide my excitement. I was incredibly giddy riding away.
Anyways, the bowl:


When I started finishing the bowl, I did not like it. I thought the wood rot cavities combined with the bold grain made it too busy looking and overwhelming. My sister helped convince me to stick with it and finish it, and I figured if I still didn't like it, I'd bring another bowl turned from a similar piece of wood with less rot, and let everyone else decide. But once I put the gloss finish on it, all my reservations disappeared. I liked it, and was sure everyone else would, too. And they did.
The bowl is turned from my last piece of Spanish Cedar lumber, and was the piece I was most scared of turning, because it had so many voids in it from the rot. As such, the inside of the bowl isn't sanded as well as I usually try to do, and still has some turning lines in it. It is hard to tell, but the rim is interrupted in two spots by a long void, which made sanding even more difficult. It is 7 1/8 inches in diameter by 1 3/4 inches tall, finished with danish oil with a polyurethane gloss topcoat.
Lesson being: Don't stop working on something because you don't like it yet. Sometimes, it ends up being one of your favorite pieces by the time you're done.
Anyways, I decided it would be cool to make a bowl for them, as sort of a thank you. Rather than giving it to them in person, though, I devised a scheme, which everyone helped out on. I decided to plant the bowl somewhere while we were getting ready to leave, in hopes they wouldn't find it until we were all gone, so it would be a surprise.
Fun, yeah?
It was incredibly hard to keep it hidden until the last moment when I put it onto their coffee table, at which point, it was incredibly hard to hide my excitement. I was incredibly giddy riding away.
Anyways, the bowl:


When I started finishing the bowl, I did not like it. I thought the wood rot cavities combined with the bold grain made it too busy looking and overwhelming. My sister helped convince me to stick with it and finish it, and I figured if I still didn't like it, I'd bring another bowl turned from a similar piece of wood with less rot, and let everyone else decide. But once I put the gloss finish on it, all my reservations disappeared. I liked it, and was sure everyone else would, too. And they did.
The bowl is turned from my last piece of Spanish Cedar lumber, and was the piece I was most scared of turning, because it had so many voids in it from the rot. As such, the inside of the bowl isn't sanded as well as I usually try to do, and still has some turning lines in it. It is hard to tell, but the rim is interrupted in two spots by a long void, which made sanding even more difficult. It is 7 1/8 inches in diameter by 1 3/4 inches tall, finished with danish oil with a polyurethane gloss topcoat.
Lesson being: Don't stop working on something because you don't like it yet. Sometimes, it ends up being one of your favorite pieces by the time you're done.
Subscribe to:
Posts (Atom)